HOW I CREATED MY GALLERY WALL with Minted (Step-by-Step)
Creating the perfect gallery wall can be really fun and satisfying but definitely a bit overwhelming to start. There are so many options and styles you could go with that deciding what your aesthetic is, let alone figuring out the steps to hang everything correctly, can be challenging. So I thought I would help you out and layout the step-by-step process I used when creating my gallery wall.
I also worked with Minted to create my gallery wall, so I will link all of the pieces I used at the very end if you want to take a look at any of them for yourself! I decided to go with Minted for two specific reasons; 1) I love that Minted has wonderful artists that create original artworks and they keep refreshing and adding new pieces to their site all of the time. This makes the pieces more unique and less likely that someone else will have the same gallery wall. 2) It made my life soooo much easier because I could go to one place that had unique prints even signed by the artist, (what!?!) and I could pick if I wanted a border, what frame type I wanted, etc. and it would be delivered to me, ready to go. Anything that can make my life easier, I am allll for!!
So let’s get started!
The materials you will need:
- Tape measure and ruler
- Butcher Paper or inexpensive wrapping paper
- Pencil (and sharpie if you want)
- Painters tape
- Scissors
- Level
- Nails & hammer or Command velcro strips
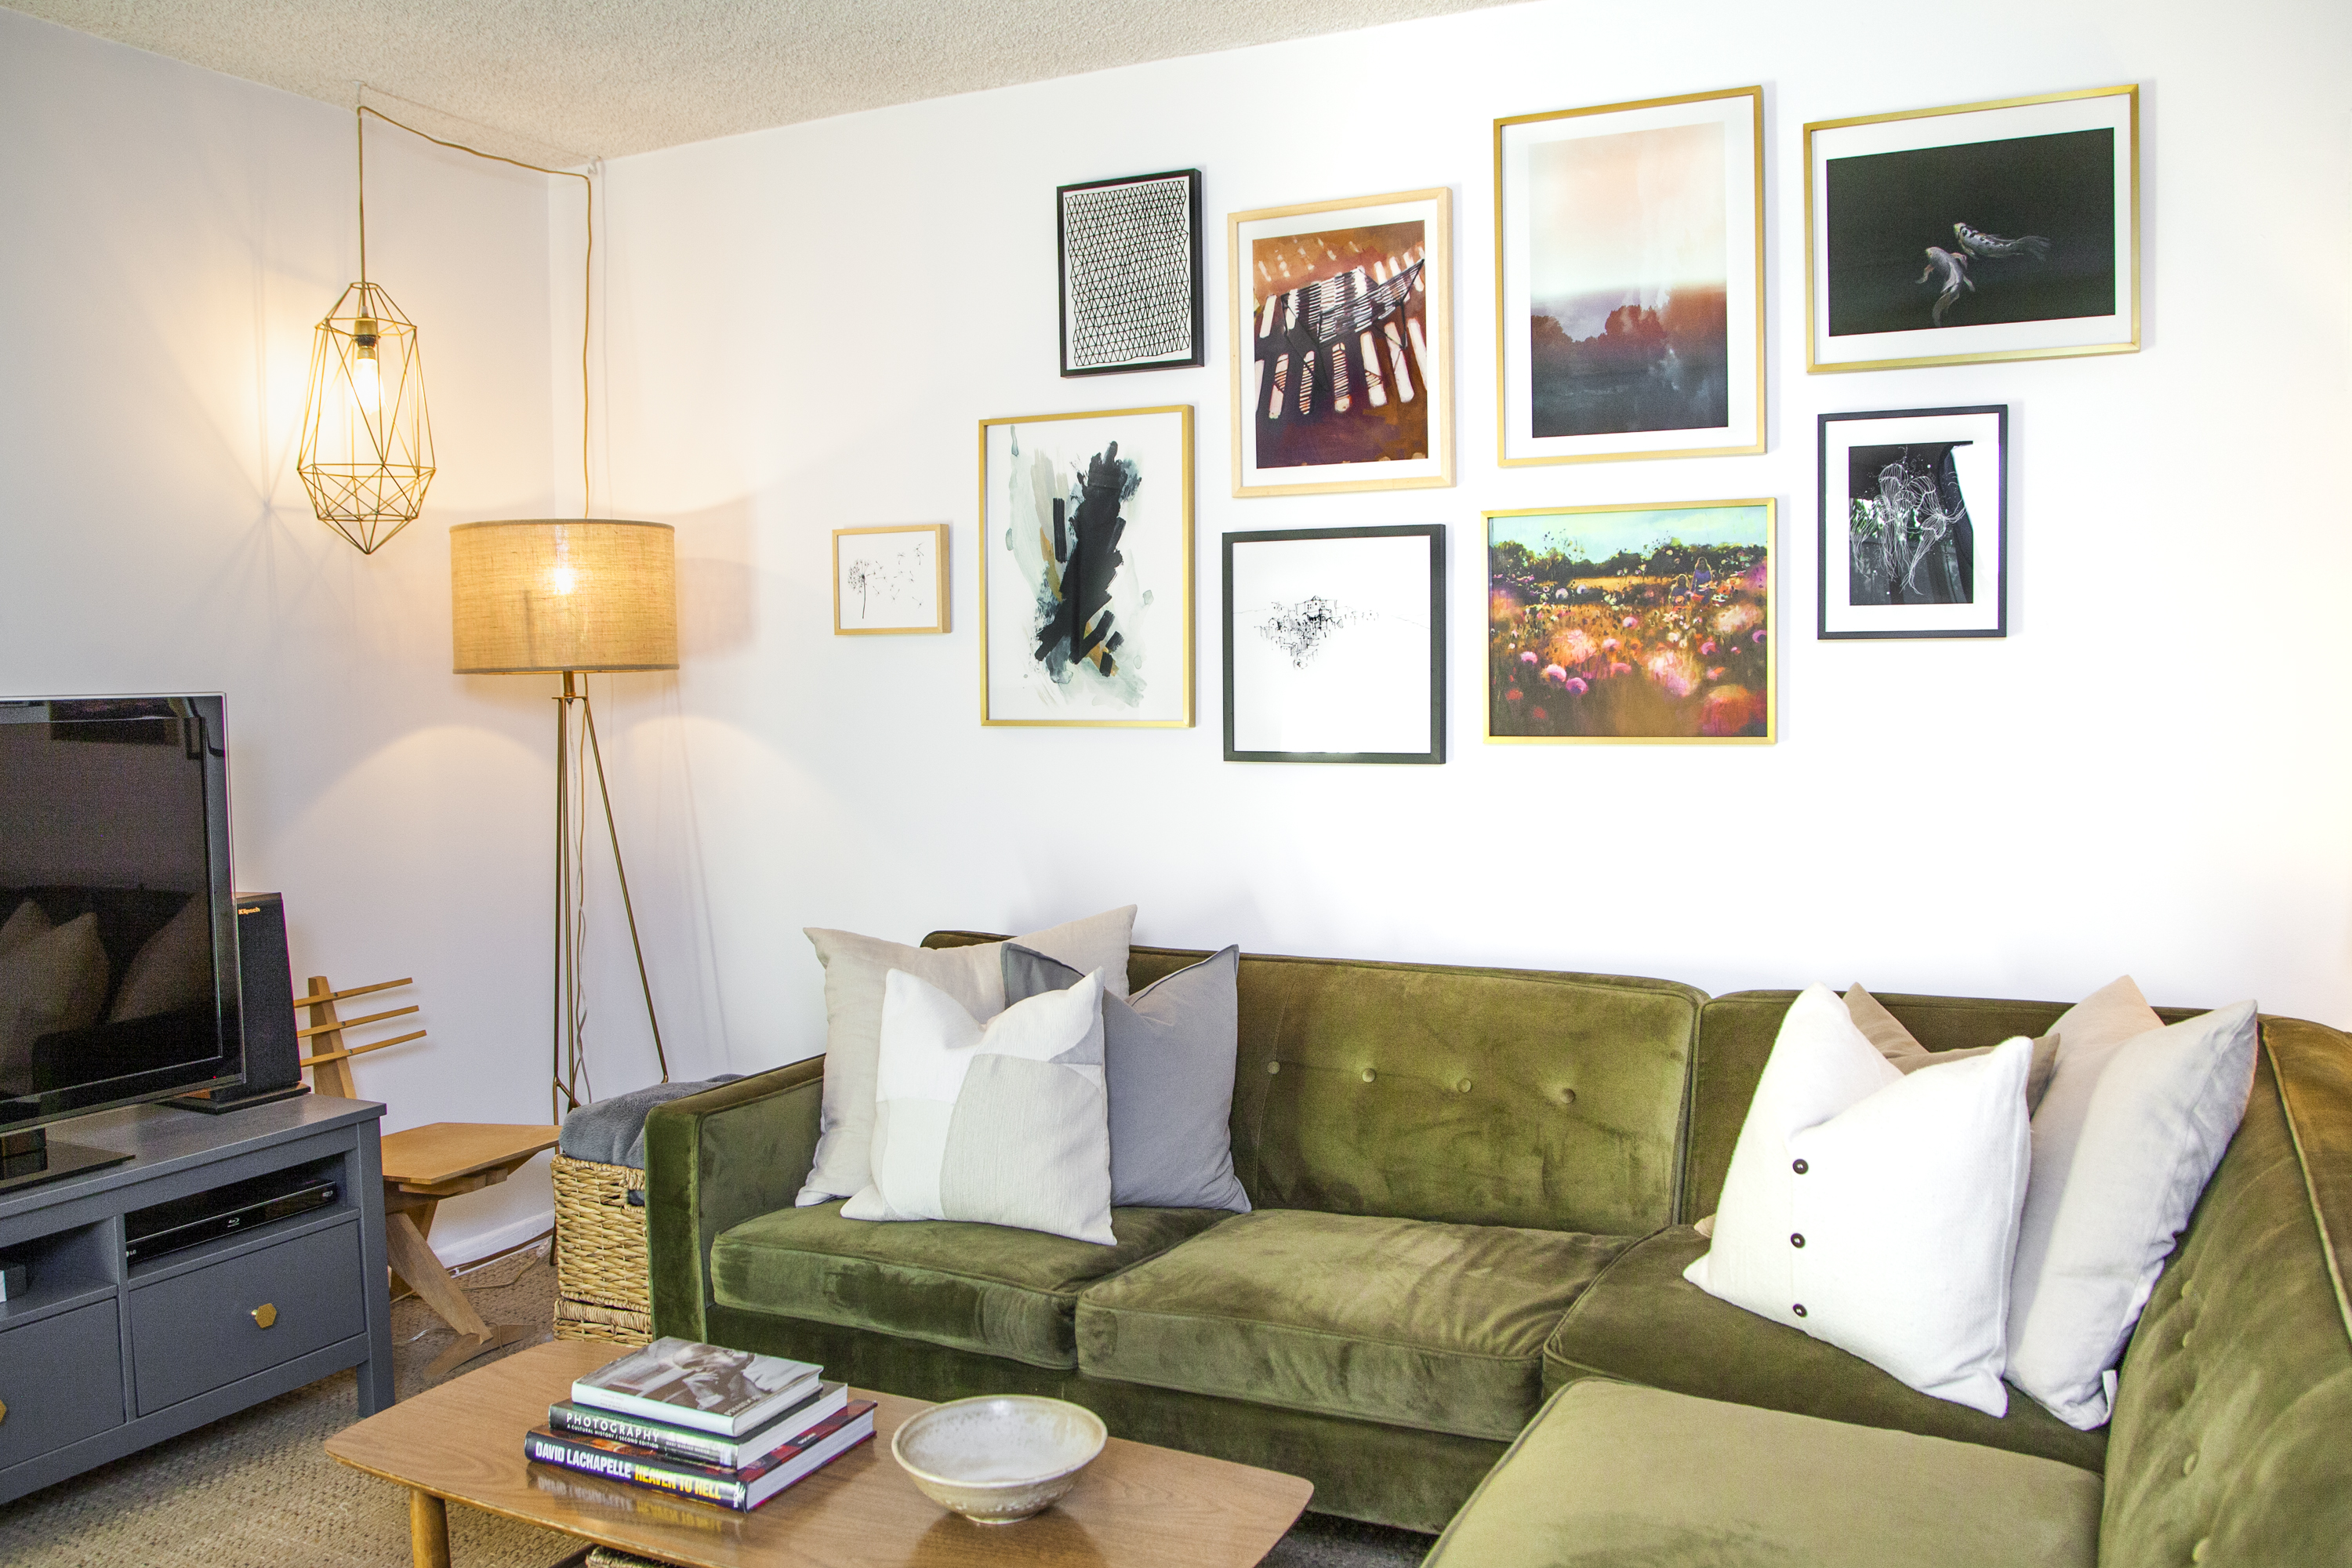
1. The first step is to decide the aesthetic you are going for. I really like the scattered, mixed media and frame look. You can decide to go the opposite direction and do all the same size and color frames, all black and white photographs or only cool printed band posters, etc. It doesn’t really matter which way you decide to go. However, you either have to have everything be the same, or go the direction that I went, which is to have a mix (having a little bit of everything.) Make sure to also consider how much darkness or lightness the images have, and try to break up pieces that are too similar so they are not next to each other.
I chose to have a mix of photography, drawings, and paintings, black and white and color, some with borders (or you can do matted) and some borderless that went to the frame edge. I also had brass, wood, and black frames.
2. Measure the size of your wall to see how much artwork you will need. Make sure to account for the space that you probably wouldn’t have photos, i.e., you wouldn’t put a photo all the way to the floor or ceiling. So if your wall is 8ft by 8ft, you may decide to do 7×4 of useable space.
3. Now depending on which route you go, this step could be different.
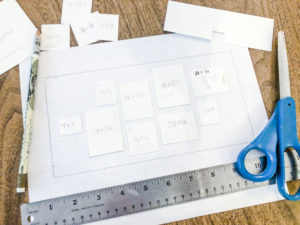
PICKING OUT YOUR ARTWORK & FRAMES FIRST: Because I was picking artwork that I liked from Minted, there were certain set sizes the prints could be. You could make them larger or small, but they had set dimensions. Because of that, I picked my top favorites and made a mock up on paper. So I took the measurements of my wall and drew it out on a piece of letter sized paper. 1 inch equalled 1 ft. Then I cut out the different sizes of the artwork I liked so I could arrange them and see what I liked.
For example, lets say that I had a print that I liked and it came in 16×16, 18×18, and 22×22. I would cut out different sizes of little squares to fit my wall drawing and then I would be able to lay them out and move them around to see what sizes I liked better and if I needed to add more or take away images based on the size of my wall.
ALREADY HAVE FRAMES AND ARTWORK: If you already have your prints and frames, or have your frames and want to fill in the artwork after, you can definitely do that too. If this is the case, lay your frames on the ground and move them around until you are happy with the layout. Again, make sure the pieces will fit in the measured space of your wall.
4. You can go the extra step if you are tech savvy, as to copy the images and paste them into something like InDesign or even Word and lay them out to make sure you have an even distribution of color, frames, etc. Again, when doing this think with not having two of the same color frames next to each other, or don’t have all of your heavy dark artworks on one side of your wall. You want to break everything similar apart and scatter them for the best effect.
5. Next lay out your butcher paper, add your frames to the paper and trace each one with a pencil. Then cut out the paper. Make sure to label what the print is (ex. pic of ocean) so that you know which paper goes with what framed artwork.
6. IF YOU ARE USING NAILS: Measure where the nail latch or wire is on the back of your picture frame and using the same measurements, add a dot on your butcher paper to indicate to yourself where to hammer in the nail.
IF YOU ARE USING COMMAND STRIPS/STICKY STRIPS: You still want to cut out the butcher paper, but you do not have to measure where to nail in your hooks, as you will stick the strips on the corner of the frame.
7. Now you have to decide how close you want your prints to be to each other. Usually they are anywhere from 2-4 inches apart. 4 inches felt too far apart for me, so I decided to go with 3 inches because I had a very large wall and didn’t want the artwork to feel cramped together with too much dead space on the sides.
Start by taping up one of the butcher paper cut outs of one of the prints you plan on having on the very end or the very center. Then, with a ruler measure the amount of inches you chose to have them separated, (for me it was 3″) and using a pencil, make light marks on your wall to know where to tape up the next piece of butcher paper. Continue until all of the butcher paper is up. This will help you to make sure you have everything lined up exactly how you want it and can make sure there aren’t any accidental mistakes that you made without realizing.
8. Final step! Add your nails in directly where you had previously measured. You can do this directly into the paper, and then tear the paper off leaving the nail in the wall. Or if you are using sticky strips, remove a corner of the butcher paper to make sure you line up the frame with your paper and continue with the other corners. Erase any pencil marks and then hang all of your artwork!
YAY!!! And there you have the steps to creating your gallery wall. I hope this post was super informative and helped you on your journey to a beautiful space! Please make sure to send me images of your gallery walls once completed. I would love to see them!! You can leave a comment below or tag me on Instagram @CassandreUrsu with your images. And, if you order any prints from Minted make sure to mention them too! @minted
Here are the links of all of the prints I ordered or you can also pick your own from Minted’s large selection at www.minted.com
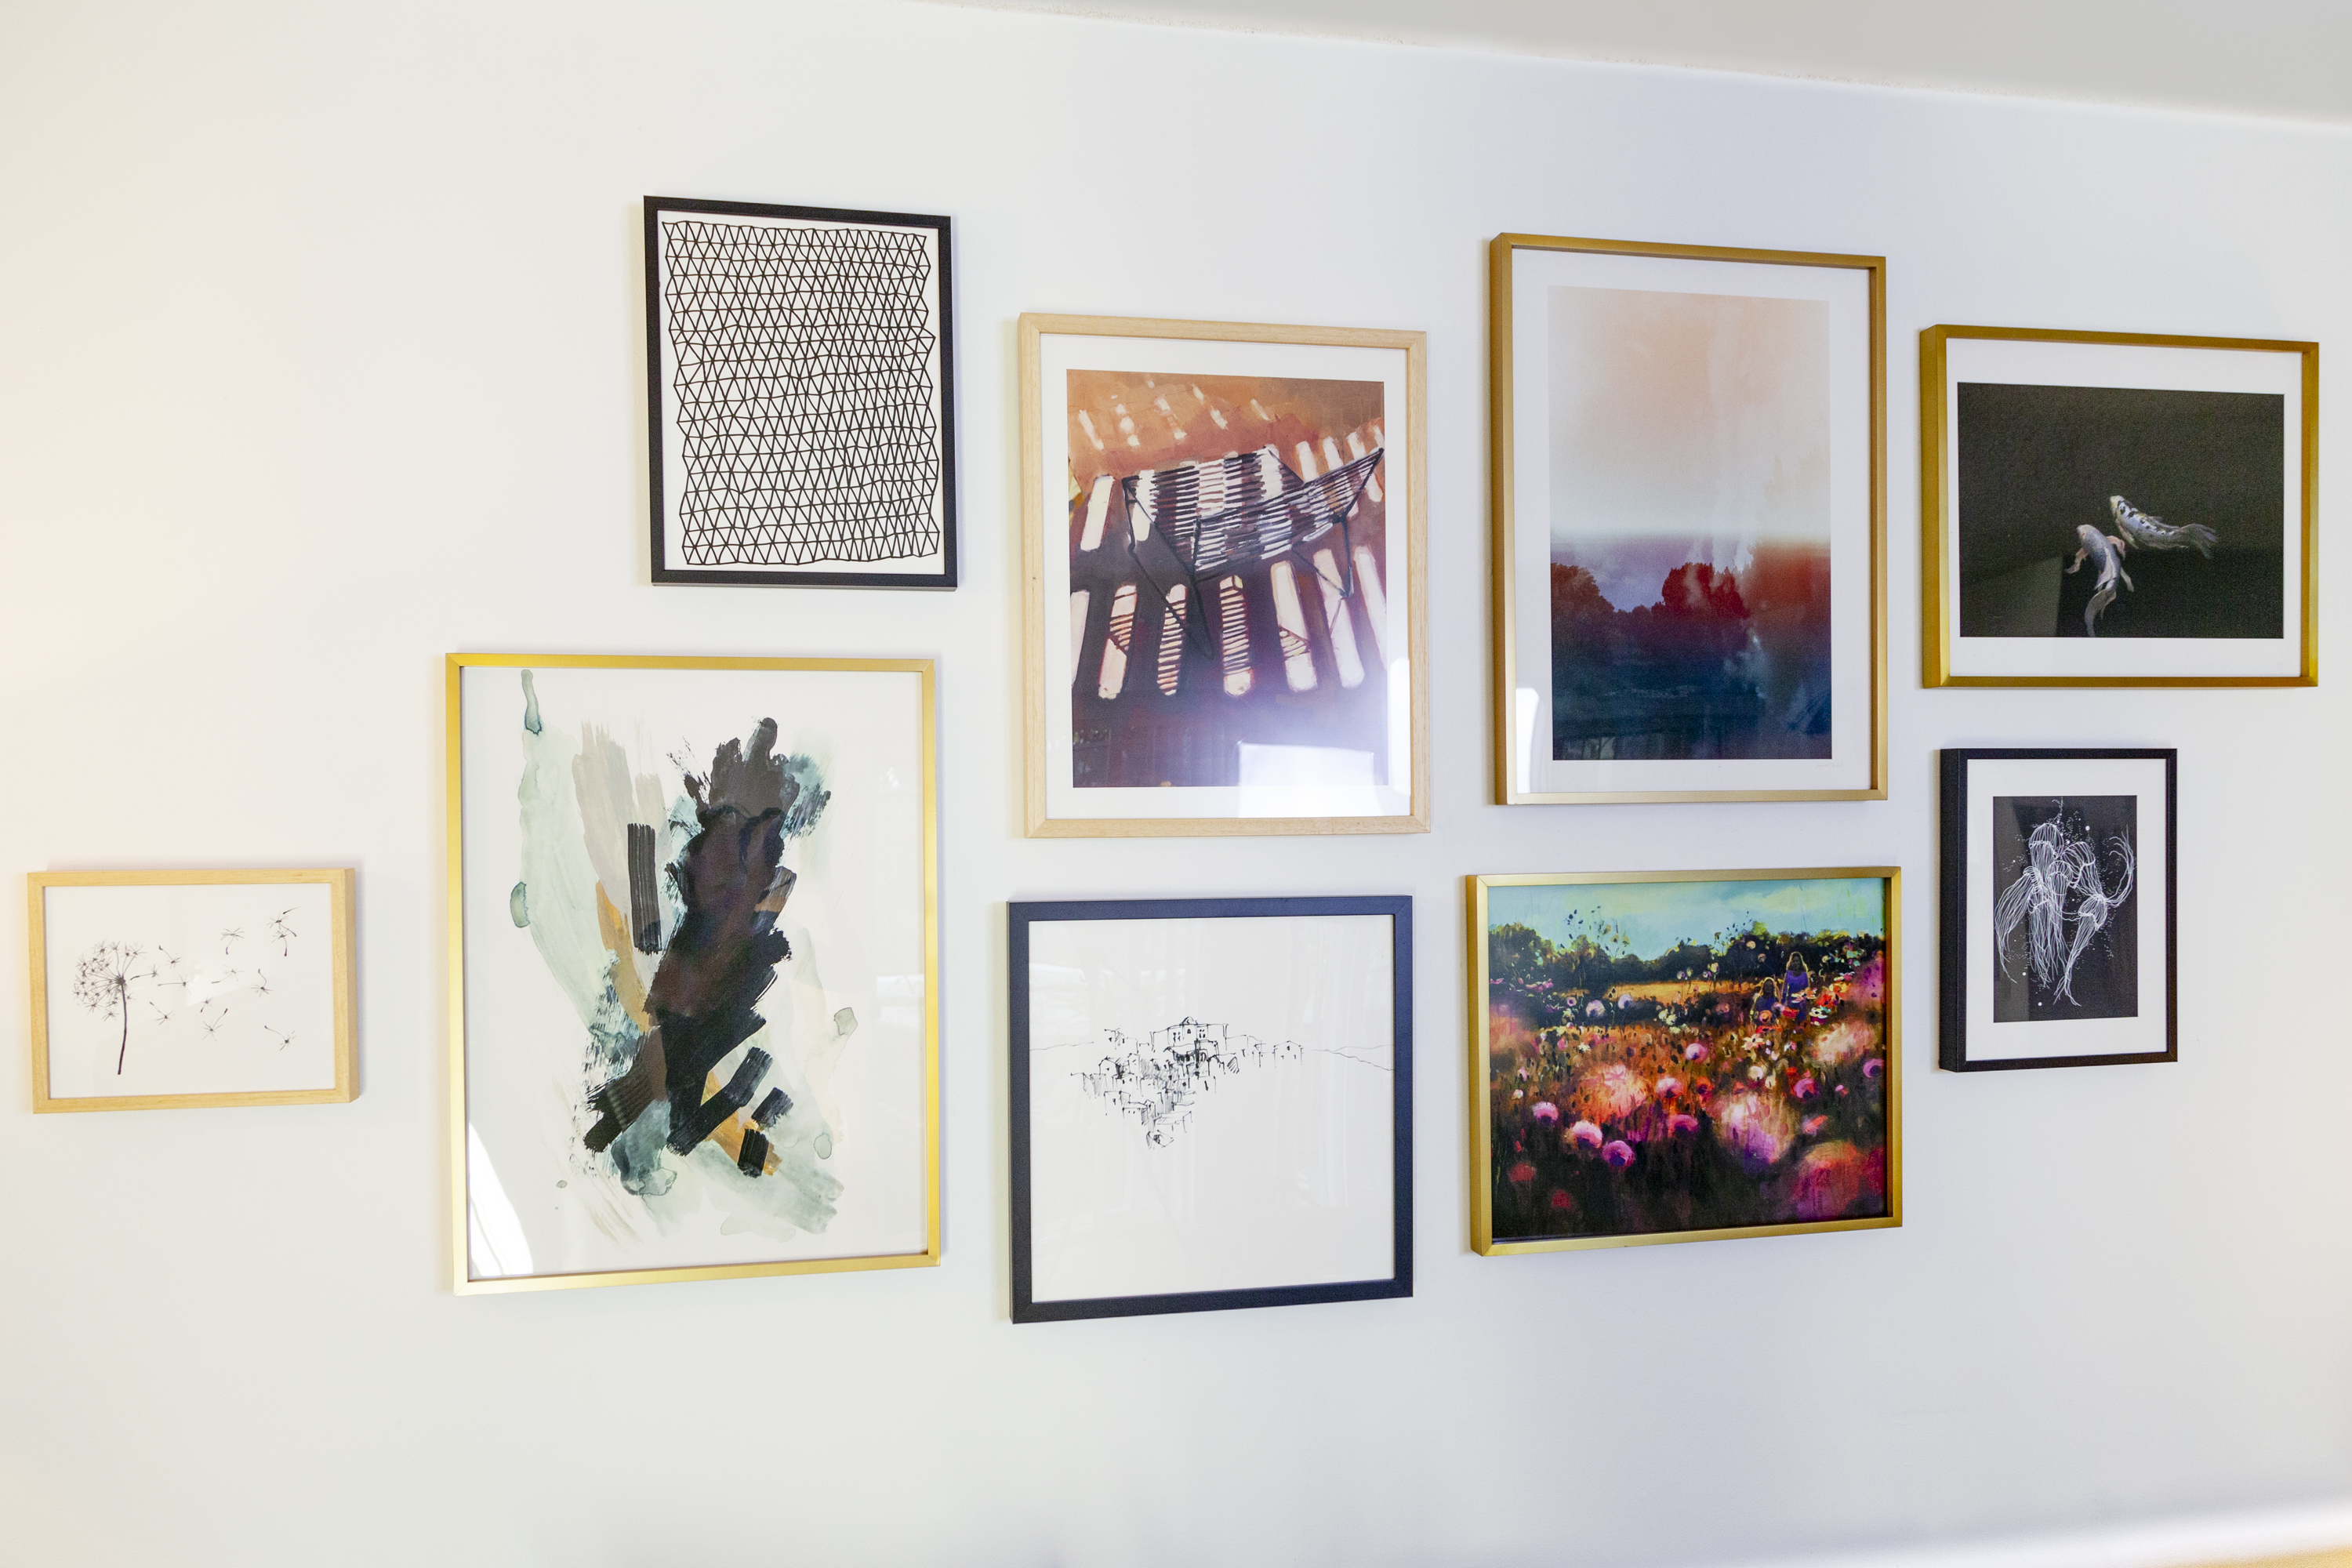
The Sassi (Drawing of Italian cave dwellings)
Paradise For The Soul (photograph of trees and water)
Chair From My Childhood II (Chair Painting Print)
Mark No. 5 (Abstract Painting Print)
Glory Days (Garden/Flower Scene)
Check out minted.com for tons of amazing original artworks, photographs, and prints. Did you know that Minted also has wall murals and pillows now?? I can feel the idea wheel turning in my brain! Go see for yourself!!!

2 Comments
Amanda
June 4, 2019 at 4:59 PM
So helpful and detailed!!
cassandreursu
September 3, 2019 at 12:03 AM
Thank you! And thanks for commenting!